Spray Chrome Troubleshooting Guide

At Angel Gilding we think that the more you understand a process - and the science behind it - the more likely you are to succeed.
We have listed the most common problems with creating a front surface silver mirror and the causes and solutions to those problems. The chart includes links to detailed explanations at the bottom of the page.
To answer one very frequently asked question -- yes, you can certainly use our chemicals in another company's spray on chrome machine. Just rinse the machine thoroughly with distilled water first and be sure to follow our mixing instructions!
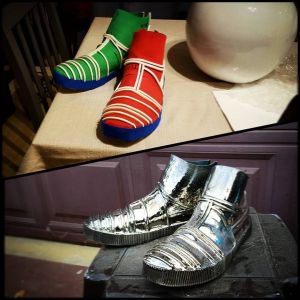
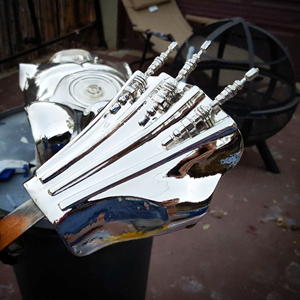
Thank you, Gordon Tarpley, for letting us show off your C-3PO and process photos.
| Appearance | Cause | Solution |
|---|---|---|
| Dull gray all over | Dull or matte surface | The surface must be high gloss - like glass - before you silver it. Silver does not make a dull surface reflective. |
| 'Orange peel' or nibs in the base coat | Base coat not applied correctly | Air pressure from the gun is too high. The gun is too close. Uni-Coat has started to dry in the gun. |
| Gray and speckled | The surface did not "wet" evenly so the Sensitizer (Tin) did not deposit evenly. | Start with a clean surface. Apply Wetting Agent and then apply a generous layer of Sensitizer on top of the Wetting Agent. |
| Small gray splotches in the silver | Silvering bare plastic | Some plastics and some base coats may not work well with silver. |
| Yellow or brown stains | Too much Sensitizer (Tin) left on the surface | Rinse the Tin and then rinse it again. You will not be able to rinse off the sensitizing layer that attaches the silver to the surface. |
| Blue areas | The chemicals are not in balance | Check that your spray guns or pump bottles are delivering equal amounts of Silver and Reducer. Be sure you have mixed the chemicals properly. |
| Dark gray in some areas | Silver was not applied evenly | Spray more silver in the dark areas to even out the tone. You can always add a little more silver. |
| Matte white areas | Too much silver | Stop silvering as soon as you have a bright, even coat. Adding more silver usually makes the problem worse. |
| Dull and dusty | Silver applied at close range Not enough rinsing |
Hold the wands or spray guns at least 1 foot (30 cm) from the surface. Spray in light, even layers. Rinse well between layers. |
| Silver rubs off very easily | Problems with the Sensitizer (Tin) | A good silver layer is difficult, but not impossible, to rub off. Use fresh Tin. Rinse the Tin very thoroughly. |
| Pale gold color after top coating | You used an un-tinted top coat. | This is an optical quality of silver metal (see below). Tint your top coat with a transparent blue or violet dye. |
| Surface wrinkled after top coating | The base coat did not cure | Allow the base coat to cure fully before silvering. The top coat is not chemically compatible with the base coat. |

TEXTURE OF THE SUBSTRATE
The silver deposited on the surface is 50 to 100 nanometers or 600 times thinner than a human hair. It is much too thin to fill in any surface imperfections on your piece. If you want the silver to look like a mirror, the surface that you silver must first look like glass.
Silver makes any imperfection - any bump or dent in the surface - much more obvious because the light that hits the bump is reflected back on a different path - the 'angle of incidence = the angle of refraction.' Uni-Coat applied to a carefully prepared surface give you the glassy texture you need to create a perfect reflection.
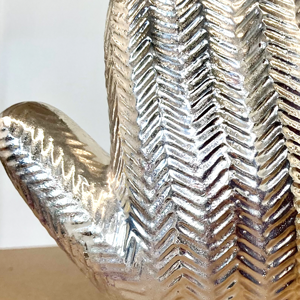
- This ceramic glove has been spray chromed. Clear Uni-Coat is thinner than other clear coats which means it helps to maintain the original texture of your substrate. This could be problematic for uneven pieces or striking for pieces with artistic texture such as this.

SPRAYING ON THE BASE COAT
Uni-Coat flows out to flawlessly smooth, glassy surface when it is applied correctly. Use a 1.0 tip on your gun. The air pressure coming from your HVLP gun should not be greater than 10 psi. Hold the gun 8 to 10 inches away and at right angles to the surface. Apply the Uni-Coat in a sweeping motion. Apply one double wet layer - a thin layer adheres better than a heavy layer. Make sure the entire surface is wet - avoid dry misting which will show up as a matte surface under the silver. Applying a heavy layer can result in runs and drips.
Make sure the Uni-Coat has not begun to dry in the gun. Partially dried Uni-Coat shows up as small nibs on the surface. The temperature of your work space greatly affects the drying time of the Uni-Coat. Clean the gun immediately after use by spraying clean acetone through it.
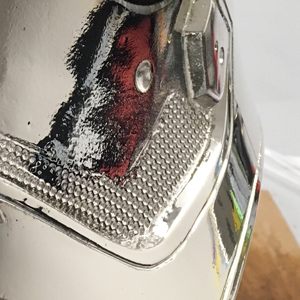
- This close up shows an even flow of basecoat on the bottom part of the piece with some more uneven texture above.

WETTING THE SURFACE
Water has a high degree of surface tension; water molecules would rather stick to each other than they would to the surface. Most plastics also have a high degree of surface tension so they repel water - they are hydrophobic. When you cover plastic with water, the water beads up and runs off.
A wetting agent - also known as a surfactant - is a substance that breaks the surface tension in water. There are many kinds of surfactants designed specifically for different surfaces. Our Wetting Agent is generic so it works on most surfaces. However, it only works when it is mixed with the water-borne chemical you are trying to apply - in this case the Sensitizer or Tin for Silver. So you must allow the two substances to mix on the surface by applying the Wetting Agent and then adding the Sensitizer.
We have tried pre-mixing the two chemicals, but the chemicals perform better when they are each at their own dilution ratios. Our two-step process is a reliable way to ensure that they both are both able to fully do their work.
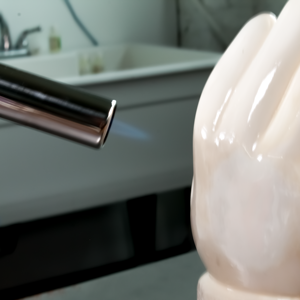
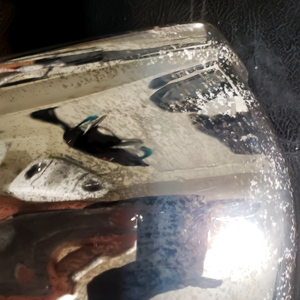
- You can see in this close up view, there are areas of white where the silver did not deposit. This is due to insufficient wetting. This is resolved with flaming the basecoat as well as the application of Wetting Agent.
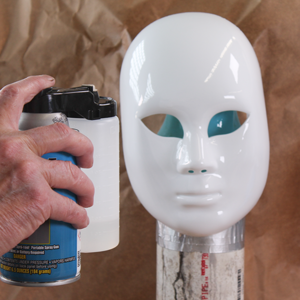

SILVERING BARE PLASTIC
If the plastic you want to silver is already high gloss, you may not need to apply a base coat. You may be able to silver directly onto the very well cleaned bare plastic. We have done this successfully on many plastics.
However, we have found that on some pieces, no matter how well we clean the surface or how much Wetting Agent we apply, the silver still has small gray speckles in it. We have not yet found the exact cause for this. We have found that we can fix the problem by using Uni-Coat base coat.
if you have the same problem, you do not need to discard the piece. Just clean off the bad silver with Silver Remover. Then clean and dry the piece carefully, and apply Uni-coat base coat.
- This image shows that although seemingly high gloss, some plastic should still be basecoated to ensure a smooth application of silver.

WATER FOR SILVERING
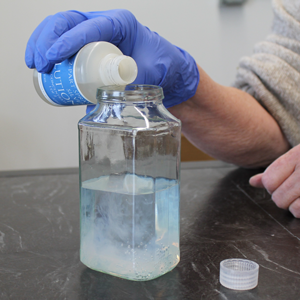
Steam distilled or de-ionized water is often available at your local grocery store. Not all bottled water is suitable for mirroring. The bottle you buy must be labeled as "distilled" "de-ionized" or "reverse osmosis". You can pay for a TDS (total dissolved solids) meter if you like, but we have a simple test for water purity and a discussion on how water is purified on our Water Purity page.
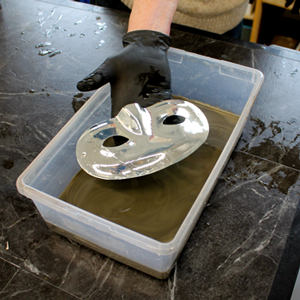
- This is a demonstration of our simple water purity test. You can clearly see that this water is not pure enough for the silvering chemistry.
Sensitizer
The sensitizer layer is invisible but it is essential to the silvering process.
The Sensitizer (Tin) layer chemically attaches the silver to the surface. If the surface is not completely covered with Tin, the silver will rub off easily or not deposit. The surface must be clean so the Tin can attach. The water that carries the Tin must be able to contact the surface - see Wetting the Surface.
The Sensitizer must be diluted according to our instructions. If it is too strong, the silver will not deposit evenly or it will be brown and streaky.
The Sensitizer must be carefully rinsed off before silvering. Extra Sensitizer left on the surface will cause brown and yellow stains in the silver. Rinse and then rinse again.
Sensitizer combines easily with oxygen in the water and in the air. When it does, it turns yellow or changes into an insoluble white powder that will not attach to the surface. Keep the bottle capped and store it in a cool location such as a refrigerator.
Balancing your spray guns
Our silvering chemicals are robust. Having the guns out of balance by less than 10% usually does not affect the silvering process.
Adjusting our Pump Spray Assembly
- The bottles must contain about 2 fluid ounces - they do not work well when they are almost empty.
- Both bottles must be fully pressurized. Forcing the piston can break the seals on the pumps.
- Use the adjustment knobs on the tips of the wands to re-balance your gun if necessary. We set the this adjustment before we ship each Pump Spray Assembly.
Adjusting our Center Handle Silvering Gun
- Use distilled or de-ionized water for this test. Do not use silvering chemicals or tap water.
- Measure 500 mL of distilled water into each bottle and attach the bottles to the gun
- Point the gun into a sink or tub, squeeze the trigger and hold for about 30 seconds.
- Remove the bottles from the guns and set them flat on your bench.
- If the bottles have not lost equal amounts of water, adjust the knobs on the end of each gun and try the test again.
- The adjustment knobs can be locked and unlocked with the hex wrench included in the tool packet.
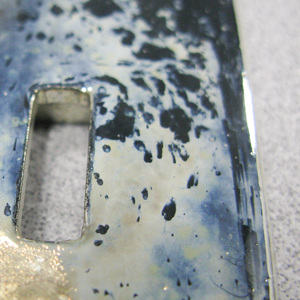

Silver develops white "clouds"
As we mentioned above, silver adheres to silver. The silver crystals build up exponentially fast. As the 'mountains' of silver crystals grow, the surface becomes rough and less reflective. Instead of a perfect mirror, you begin to see dull, white areas. Adding more silver makes the problem worse. Because the silver is so thin (see above) burnishing does not solve the problem.
To avoid the problem, apply the silver in thin layers and rinse it between each layer.
Allow the silver time to develop
This problem is similar to the problem of white "clouds" above. The silvering reaction takes place on the surface when the silver and reducer mix together. The process is fast, but not instant. You will have better results and waste less silver if you give the chemicals time to mix and develop evenly. Hold the wands or spray gun far enough away from the surface so that the chemicals can mix in the air and fall evenly. Using less force and taking your time will give a more uniform result.
This piece has an excess amount of silver on the surface, resulting in a dull, murky appearance of silver. Slow and steady wins the race!

Tinting the top coat
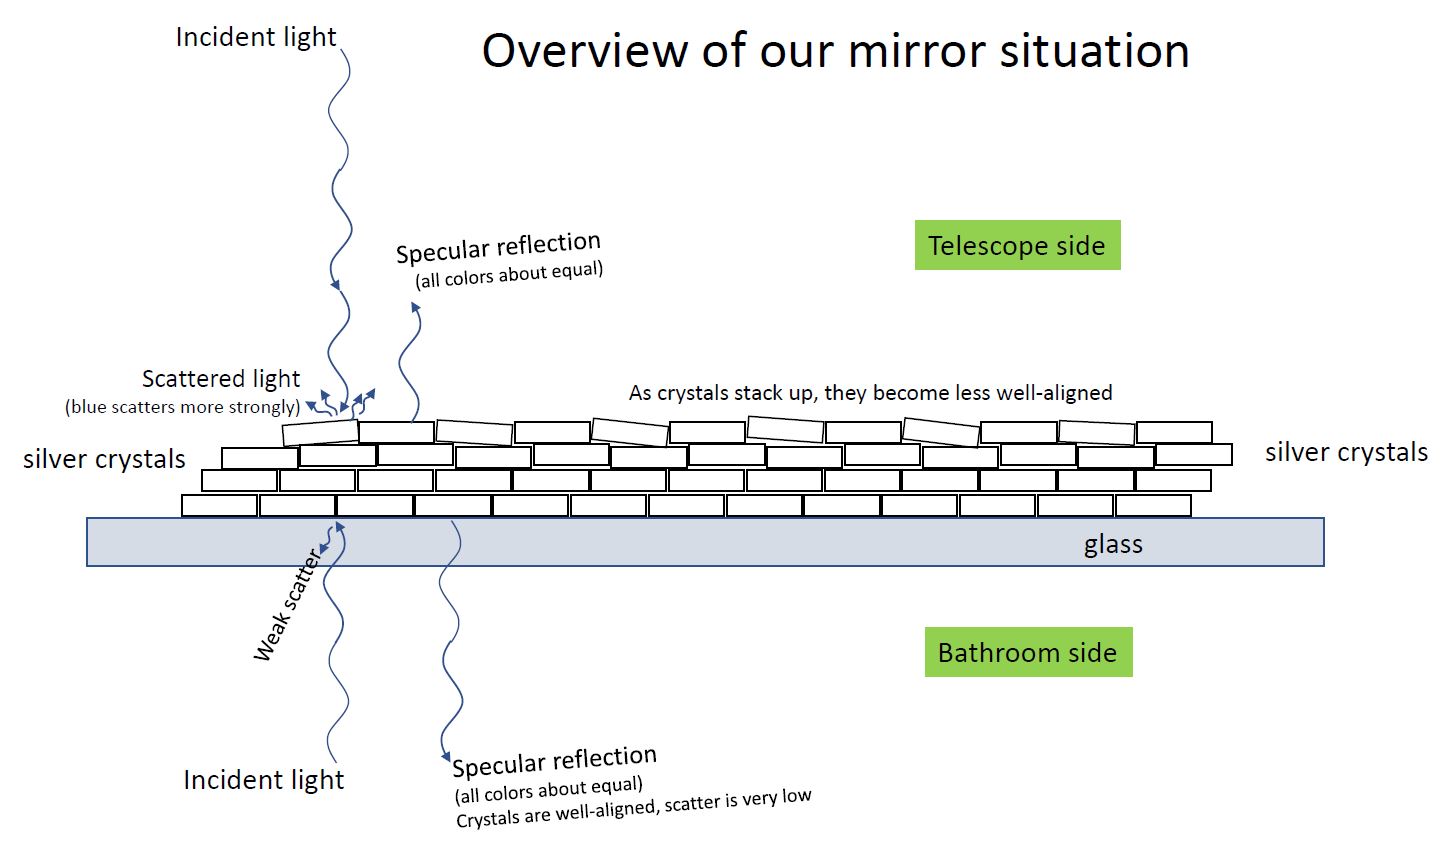
Unlike aluminum, steel or chrome, silver metal has an optical property called "thin film interference". When it is covered with any thin clear film - including distilled water - silver absorbs blue light and reflects yellow light. You can test this by looking at wet silver next to dry silver. The wet silver looks yellow. The yellowing is not caused by a "contaminent" the base coat or top coat.
Because silver formed by the mirroring process is pure elemental silver, it is not chemically possible to add a tint to the metal. The only way to counteract the effect of thin film interference is to add a tint to the top coat. Since the light coming from the silver is yellow, the logical color to add is blue because blue is the opposite of yellow in terms of light. However, most color-fast blue dyes have a tendency to look slightly green in a dilute concentration. The reddish tones in a violet tint counteract the green tones in the blue, so we recommend adding violet dye to the top coat.
Make all color judgement by viewing the piece in full daylight without artificial light. Incandescent and fluorescent lights tend to make any surface look yellow.
Wikipedia has a full explanation of Thin Film Interference
Un-cured or incompatible base coat
See our Clear Uni-coat Product Data Sheet for information on air- drying or force-drying the base coat. The base coat cannot dry or cure after you apply the silver. We recommend at least 12 hours of drying time at 70 ° F (20 ° C) before silvering.
If you use Uni-Coat top coat (clear or tinted) over another base coat, the two might be chemically incompatible even if the other base coat is perfectly cured. The same is true with applying Uni-Coat over an unknown bare plastic. As always, you can save yourself a lot of trouble by taking the time to test all the variables first.
If you have any questions or proposed corrections to this Guide, please contact us.
Please let us know if you see this guide on another website. The copyright for this Guide belongs to AngelGilding.com.


